Showing posts with label dessert. Show all posts

Tuesday, 29 March 2016

Beware The Eggs of March

My favourite thing about Spring is not the warming temperature nor the blossoming daffodils or even the fact that it's my birthday. No, dear reader(s) my favourite thing about Spring is that it means I can make and (over)indulge in one of my favourite seasonal Easter treats: Cadbury Crack. This is not your average annual Easter cookie or cupcake, this is the mother of all Easter treats and it combines pretzels, toffee, chocolate, coconut and mini eggs and it's so delicious you will eat it until you feel sick and then keep going. It's the mini eggs that make it Easter otherwise you could eat it all year round but then I'd probably have diabetes and weight about a thousand pounds.

Cadbury Crack


1 bag salted pretzels (if you can find the stick ones their easier to lay flat)
1 1/4 cup salted butter
1 1/4 cup packed dark brown sugar
1 tsp vanilla extract
250 g baking chocolate
1/2 cup shredded coconut
1 family sized bag of mini eggs (300g)

-Preheat oven to 200ºC.
-Line a baking sheet with parchment paper and evenly spread the pretzels across the pan.
-In a medium sized pot melt the butter and sugar and bring to a boil. Let boil for 2-3 minutes until thickened. Add the vanilla and stir.
-Pour the mixture evenly over the pretzels and bake for approximately 6 minutes. Meanwhile, melt the chocolate.
-Remove the toffee and pretzels from the oven and allow to cool until no longer bubbling. Then pour the chocolate over the top. Sprinkle with coconut and crushed mini eggs and refrigerate for at least one hour before breaking into small pieces and binging.
Don't eat in bed if you're not willing to wash chocolate out of your sheets!

Hoppy Easter!
  -Holly

Based off of a recipe by HoneyBear lane available here

Sunday, 10 January 2016

Toffee Mocha Torte, How Obscenely Decadent

Hello Dear Readers! ie. Mum (and Matt?)

    The past few months have been busy with school and moving and I've had next to no time to bake. Luckily, I'm home in Vancouver for a few weeks for the Christmas break so not only do I have spare time to pursue hobbies (such a strange feeling) but I also have all kinds of lovely tools to use!

    I've been invited to a friend's birthday celebration tonight as my one social engagement whilst I'm here and I offered to bring dessert so I'd have an excuse to use my beloved KitchenAid. Bonus, I picked a recipe also requiring coffee so I got to use my espresso machine too, it's so nice being with my loved ones. I'm making a cake I first made a few years ago for Thanksgiving, but that was pre blog so now I have the opportunity to share this delicious and incredibly simple cake with you!

It's about -4ºC outside right now so it's a perfect day to crank Adele, reflect on any deep unrequited love (childhood sweetheart, ex-lover, boss, those shoes you had to leave behind in Selfridges) and allow the warmth of the oven to thaw your cold, dead heart. No, just me?

Toffee Mocha Torte
(serves: a lot)
1 cup butter, softened
2 cups sugar
2 eggs
1 1/2 teaspoons vanilla
2 2/3 cups flour
3/4 cocoa powder
2 teaspoons baking soda
1/4 teaspoons salt
1 cup buttermilk
1 cup coffee

1 tbsp strong coffee (or 1 tbsp hot water and 1/2 tsp instant coffee)
2 cups heavy whipping cream
3 tbsp light brown sugar
250 g toffee pieces (in Canada I use Skor bits, I'm hunting for an alternative in the UK)

1. Cream butter and sugar until "fluffy"(when does it ever look fluffy?) Add eggs, one at a time, beating well after each one. Beat in vanilla.Then, combine the flour, cocoa, baking soda and salt and add it to the creamed mixture a little at a time alternating with buttermilk or else it will explode everywhere and you'll curse loudly. Beat well after each addition. Stir coffee into batter. 

2. Pour into three greased and floured 22 cm (9 inch) round baking pans. Bake at 180ºC (350ºF) for 20 minutes or until a toothpick comes out clean. Mine took closer to 30 minutes but I think I used smaller pans and therefore they were thicker. You can see how precise I am about these things.

3. For the whipped cream topping, pour coffee into a large bowl; cool. Add the cream and brown sugar. Beat until stiff peaks form. Place whichever cake you decide should be the bottom layer on a serving plate; top with approximately 1/3 of topping and sprinkle liberally with toffee bits. Repeat until cake is fully formed. Store in the refrigerator. 

4. Transport to venue, put in candles, light, serve to handsome birthday boy and hopefully dazzle with your baking talents.

Happy Baking!

-Holly

Tuesday, 14 July 2015

Love is blonde, and lovers cannot see

I don't know what I just did, but it was delicious. I'm not entirely sure what I was expecting when I made this recipe but this wasn't it. I went into this with the intention of making Snickerdoodle Blondies. For those who don't know a Blondie is basically just a brownie without cocoa giving it more of a toffee flavour than chocolate.  Even though I wasn't baking for Count No-chocula he has made me more aware of recipes that contain chocolate so his presence lingers on long after the dust (flour? cocoa powder?) has settled. Also I just happened to have all the ingredients needed on hand so it's not like I'm thinking about him or anything..
   So these Snickerdoodle Blondies are a white, toffee-esque chewy square with cinnamon sugar sprinkled on the top. I had to cut the recipe into 2/3, because I'm a glutton for punishment and a mathematical challenge and also because that's approximately how much smaller our pan was than the one used in the original recipe. I used butter instead of the Crisco used in the original recipe (because Crisco makes me uncomfortable unless it's in pastry and even then I have to not think about it) and they ended up a little on the greasy side, but seriously as long as there was a serviette close by who cares, they tasted amazing. The bake time/temperature was also a bit off on my oven and so I ended up with gooey centres and crispy tops and sides which is the greatest thing ever and I'm not complaining.
 
Snickerdoodle Blondies

1 c butter, softened
1 1/2 c sugar
1/2 dark brown sugar, packed
2 eggs
1/2 tbsp vanilla
2 c flour
2 tsp baking powder
1 tsp cinnamon
less than 1/2 tsp salt

Topping:
2 tbsp sugar
2 tsp cinnamon

Preheat your oven to 180º C (350º F, gas mark4) and line a 9x13 pan with parchment paper (purely for ease of cleanup, you can lightly grease the pan and just whack it right in if you don't mind doing the dishes)

Cream butter, both sugars, eggs and vanilla until smooth. Add in flour, baking powder, cinnamon and salt and mix until well combined. Pour it into your prepared pan and spread evenly using a rubber spatula or your good ol' hands. Sprinkle with the cinnamon sugar mixture and bake for 30 minutes or until golden brown and the centre has set.

Clean up the flour that has managed to cover 2/3 of your kitchen.

That last one might just be for me.

Happy Baking!

-Holly


Monday, 11 May 2015

Lemon Coconut Cake

  This is another round of "what's about to go bad that I can turn into something delicious" baking. I discovered some lemons that were about to turn hanging out in the fruit basket here so I found this recipe for Lemon Coconut Bread that looked like it could be a winner. The recipe called it a bread, but let's be honest it's a bread in the same way that a Big Mac is an appetizer. As far as I'm concerned calling banana bread a bread is a bit of a stretch, it doesn't require yeast or kneading, it's sweet and cakey, it's cake. Although whatever you call it, it's damn good. 

   This particular cake is a moist and fluffy with a lovely crunch on the outside. It's full of lemon flavour with just a hint of coconut. Not enough that you feel like you're eating a Pina Colada (or sunscreen) but enough that you can feel the warm breeze of the Pacific Ocean as you stuff your face and feel grateful that this hint of the tropics can be enjoyed in your comfy pants without the risk of sunburn. I added some extra coconut and lemon to my version for the extra boost. Assembly is quick and painless (with the exception of zesting the lemons which can either be a breeze or a pain depending on the day) and the real test is waiting patiently while it's in the oven for 40 minutes. It's worth the wait though, I assure you.

                                                                                             Lemon Coconut Cake

-1/2 c butter, softened
-1 c sugar
-2 eggs
-3 tbsp lemon juice
-grated peel of 3 lemons
-1 1/2 c flour
-1 tsp baking powder
-1/2 c coconut milk
-1/2 c shredded coconut

For the glaze:
-icing sugar
-lemon juice
-shredded coconut for sprinkling


  • Line a loaf pan with greaseproof paper. You can also just grease and flour the pan but it makes clean up a little more tricky. 
  • Preheat oven to 180ºC(350ºF).
  • Cream butter and sugar until smooth and fluffy. Add eggs, lemon juice and peel and mix well. 
  • In a separate bowl combine flour and baking powder. Slowly add to the butter mixture and mix until well blended. 
  • Mix in the coconut milk and shredded coconut and then pour into the prepared pan. 
  • Bake for 40-50 minutes depending on your oven until a toothpick inserted into the centre comes out clean. (If the top starts to get a bit too brown for comfort throw some tin foil over the top to stop it from burning)
  • Let cool completely on a wire rack before glazing. 
  • For the glaze simply mix icing sugar and lemon juice until you reach a desirable drizzling consistency. Drizzle over cooled cake and sprinkle with extra shredded coconut. 


Enjoy!
-Holly 

Tuesday, 21 April 2015

Chocolate Truffle Cookies

       I write this to you on a rainy, dark Vancouver evening sitting in my jammies in front of the fire which anyone who knows me knows is just how I like it. What goes well with dark, rainy evenings? Well, a lot of things, but fudgy, moist oh so chocolatey cookies for one! So for day 3 of cookie week I introduce to you....the Chocolate Truffle Cookie. It's normally what I would consider a "seasonal cookie" but maybe that's just because I first made them for Christmas two years ago but there's no rule in my book, written or unwritten, that says you can't enjoy these babies year round.    


Like the name implies they're basically the cookie form of the inside of a chocolate truffle. Dark, with a rich chocolate flavour that quite literally melts in your mouth. Whatever you do, don't eat the dough or else they won't make it to the oven, but then you can reward your self restraint by licking the bowl and spoon until all you can taste is porcelain.

Chocolate Truffle Cookies
Makes 24 (less, if you start on the dough, I got 20 out of my last batch)

4 oz unsweetened chocolate
2 c semi-sweet chocolate chips, divided
1/3 c butter
1 c sugar
3 eggs
1-1/2 tsp vanilla 
1-1/2 c flour
2 tbsp cocoa powder
1/4 tsp baking powder
1/4 tsp salt
icing sugar for dusting

In the microwave (carefully!) or in a heatproof bowl over boiling water, melt the unsweetened chocolate, butter and 1 c of chocolate chips.
Let stand to cool for 10 minutes. 
Meanwhile beat the egg and sugar, add the cooled chocolate mixture and vanilla.
In a separate bowl combine flour, cocoa, baking powder and salt.
Gradually beat the flour mix into the chocolate until just combined.
Stir in remaining chocolate chips.
Cover and refrigerate for about 3 hours or until firm enough to easily shape into balls. 
Scoop out enough dough to make 1-1/2 inch balls. Place each ball 2 inches apart on an ungreased cookie sheet.
Lick off all the gooey dough that is stuck to your hands, spoon, bowl, kitchen counter wherever. 
Bake at 350ºF (180ºC) for 10-12 minutes until the tops begin to crack. Transfer to a wire rack to cool completely. Dust with icing sugar.

If you don't want the gooeyness all over your hands you can flour them ahead of time to prevent sticking, but I mean really, why bother?

Happy licking!
-Holly


Sunday, 19 April 2015

Toffee Sandies

          
      When I left for London last time I left my Dad with nine bags of cookies in the freezer to keep him going until I got back. I was trying to ease the withdrawal pains of not having me around. He loved these whole wheat Toffee Sandies so much that the label from one of the bags has been stuck to the backsplash in our kitchen since he finished the bag as a subtle reminder that he really likes them and would be really happy if I made them again. 
Not so subtle hint


    As I'm off to London again shortly for twice as long    I'm  restocking him to keep him going until Christmas.  Obviously I knew the first kind of cookie I was going to  have to make would be these ones and I understand  why; they are delicious. 

   Usually I'm a chewy cookie kind of girl. In my world the cookie doesn't crumble unless it was overbaked but these guys are the exception to my rule. They are the ultimate crumbly cookie but in a soft, silky way. Like eating a white sand beach if it were delicious and tasted like almonds. Hence the name "Sandies". 

They're also incredibly easy to make. 

Toffee Sandies
Makes 2 dozen

1/2 c butter, softened
1/2 c icing sugar
1/2 c granulated sugar
1/2 c canola oil
1 egg
1/2 tsp almond extract
1-3/4 c all purpose flour
1/2 c whole wheat flour
1/2 tsp baking soda
1/2 tsp cream of tartar
1/2 tsp salt
1/2 c chopped toasted almonds
1/2 package toffee bits (aka Skor bits in Canada)
Preheat your oven to 350ºF (180ºC)
In a large bowl cream butter and both sugars until light and fluffy (or you know, just well mixed)
Add canola oil, egg and almond extract and mix until combined. 
In a separate bowl combine flours, baking soda, cream of tartar and salt. 
Gradually add the dry ingredients to the sugar and butter mixture and mix well. 
Stir in almonds and toffee pieces. 
Fill a small dish with a few tablespoons of granulated sugar.
Make 1 inch balls and roll in the sugar. 
Place on an ungreased cookie sheet and press down with a fork to flatten.
 Bake for about 15 minutes until the edges are lightly browned. 
Remove and allow to cool before stuffing your face. 

Happy eating!
  -Holly

Recipe adapted from Taste of Home

Tuesday, 3 March 2015

Double Chocolate Cookies From Heaven

Just found the most fudgey, moist, chocolatey delicious cookie I've ever tasted. It's almost like a gooey brownie and a chocolate chip cookie gave birth to the most perfect child since Harper Beckham. (Those pictures from Fashion Week? Could she be any cuter?) One of these bad boys will satisfy even the most aggressive of chocolate cravings and since they're so moist, they don't go stale quickly. I was hesitant to make them considering I already have what I thought was a great double chocolate cookie recipe, thank goodness I reconsidered. This is the only double chocolate cookie recipe I will be using for the forseeable future! 


Shall I just go ahead and call these Harper Beckham Double Chocolate Cookies?

1c. Semi-sweet chocolate chips
2tbsp unsalted butter or margarine
1c and 3tbsp all purpose flour
3tbsp unsweetened cocoa powder
1tsp baking powder
1/2tsp salt
1/2c sugar
1/4c and 2tbsp packed brown sugar
2 eggs (at room temp)
2tbsp milk
1 1/2 tsp vanilla
1c milk chocolate chips

-Preheat oven to 300F (150C). Line two baking trays with parchment paper and lightly grease.
-Over low heat, gently melt the semi-sweet chocolate chips and butter until smooth. 
-In a medium sized bowl combine flour, cocoa, baking powder and salt. Set aside.
-In a separate bowl beat the eggs and mix in both the sugars, the milk and vanilla, 
-Add the wet ingredients to the dry (or vice versa) and stir just until combined. Fold in the chocolate/butter and then the milk chocolate chips stirring until the mixture is just blended.
-Scoop in generous tablespoons of batter onto your prepared baking trays and bake for 18-20 minutes until firm but soft. Let sit on baking tray for five minutes to set before transfering to a cooling rack. Eat warm, cold, lukewarm and often!

This is the first cookie I've ever been able to eat half and feel satisfied enough to walk away, they're that indulgent. Or maybe I'm just growing up. More likely they're just a really, really good cookie. 

-Holly


Thursday, 22 January 2015

Let Not Light See My Blackberry and Deep Desires

          There's a rainfall warning in Vancouver right now which basically means we're going to get a lot of rain in a short amount of time. This differs from normal when we get a lot of rain in a long amount of time. Not that I'm complaining, grey and drizzly is my climate and perfect weather for trying out a new recipe!
       
           My Pinterest is full of delicious looking recipes that are just asking for a day like today (as well as most of the recipes on the blog!) so I started sifting through looking for one that tickled my taste buds. Seeking a bit of guidance I asked Papa Bear what he was in the mood for and he requested after much humming and hawing (he's not used to having a say in these things) that we have a surplus of frozen blackberries and he'd like some sort of cobbler. One of his summer past-times is hunting down blackberry bushes and picking them clean. I believe we have some on our property along with our raspberry bushes but judging from the seven containers in our freezer right now I suspect he imported from neighbouring properties. He picks and Mum and I make the pies, or cobblers in this case.
     
           I had actually just deleted the one cobbler pin I had as it didn't seem as appealing to me but it was fresh enough in my mind that I could search it out and upon re-examination it looked like a pretty delicious idea. A cobbler, but with a sugar cookie topping instead of biscuits. For anyone unfamiliar with cobbler, it's like the filling of a pie but with a soft biscuit on the top instead of a pie crust. This particular recipe was for a blueberry cobbler so I adjusted it for my own purposes.

Blackberry Sugar Cookie Cobbler


  • 2 cups flour
  • 1/2 tsp. baking powder
  • 3/4 tsp. salt, divided
  • 1 cup unsalted butter, softened
  • 1 1/2 cups sugar, divided 
  • 2 tbsp brown sugar
  • 1 egg
  • 2 tsp. vanilla
  • 2 pounds blackberries (I didn't weigh, I just eyeballed a good amount)
  • zest of 1 lemon
  • 2 tbsp. lemon juice
  • 1/2 tsp. cinnamon      


  • Combine flour, baking powder and 1/4 tsp. salt. In a separate bowl cream butter, 1 cup sugar and brown sugar until light and fluffy. Add the egg and vanilla and mix to combine. Slowly add dry ingredients, mixing until just combined. Wrap dough with plastic wrap and refrigerate. 

    In a large bowl, combine berries, remaining 1/2 cup granulated sugar and 1/2 tsp. salt, cinnamon, and lemon zest and juice. Add a little extra sugar if you're not crazy about the tartness of blackberries, I kept the original amount from the blueberry recipe which Mum appreciated but Papa Bear found to be not quite sweet enough for his tastes. Stir, mashing slightly. Cover and refrigerate 2 hours. 

    Strain berry mixture, adding juice to a small saucepan, and return berries to bowl. Simmer juice on medium heat until reduced by half, about 10 minutes or until you get frustrated by the fact that it's not reducing, crack and accept that your cobbler will be soup. Approximately 30 minutes. Pour over fruit and stir.

    Preheat oven to 350°. Spoon fruit mixture into a 9" x 13" oven-safe dish. Flatten balls of dough between your palms into 1/2"-thick rounds and lay over fruit. Or roll out to 1/2" thickness and use cookie cutters to make fun shapes. I didn't, but I kind of wish I had. Repeat until fruit is mostly covered. Place dish on a baking sheet and bake until the top is golden, about 1 hour. Any leftover dough can be baked off as cookies and snacked on while waiting for the cobbler to bake as they only take about 15 minutes. 

    Original Blueberry Cobbler recipe courtesy of Lady O and can be found here: http://www.oprah.com/food/Blueberry-Sugar-Cookie-Crisp-Recipe

    Tuesday, 6 January 2015

    Toffee or not Toffee

    So this Paul Hollywood guy knows what's up. This is the second time in the last couple of weeks I've used one of his recipes and he has not let me down. The first was my Christmas Morning croissants which I will remake and blog about another time as I was too ill to take pictures (but not too ill to bake!)

      My parents were having a friend over for dinner as one of their five yearly social engagements and seeing as though I'm currently unemployed and bored out of my tree I volunteered to make dessert. It would both keep me entertained and allow me to check one of my "to make" items off my list. I picked a sticky toffee pudding as I've been wanting to try my hand at it for awhile and also if I can be in England, I can at least eat English food with my eyes closed and pretend. In which case I usually pretend I'm being fed by Prince Harry in my country estate wearing Jimmy Choos because, hey, dream big.

    The recipe is pretty simple, I cut it in half as we've been on dessert overload since Christmas and didn't need any leftovers. I also took out a couple ingredients that were either difficult to find or not to people's tastes.

    STICKY TOFFEE PUDDING

    • PUDDING
    • 175g/6oz dates, chopped
    • 1 tsp baking soda
    • 75g/2½oz unsalted butter, softened
    • 150g/5½oz soft dark brown sugar
    • 2 eggs, beaten
    • 175g/6oz self-raising flour
    • ½ tsp baking powder
    • Preheat your oven to 180C/350F and butter a 24x26cm (9½x10½in) baking tin.
    • Put the dates in a bowl, pour on 200ml/7fl oz of boiling water and stir in the baking soda.
    • Cream the butter and the sugar together in a large bowl until light and fluffy. Add the egg, beating well. Fold in the flour and baking powder then stir in the dates and their water.
    • Pour into prepared pan, spread evenly and bake for 20-30 minutes until firm.


    • SAUCE
    • 100g/3½oz unsalted butter
    • 150g/5½oz soft dark brown sugar
    • 150ml/5fl oz whipping cream (double cream)
    • Melt together the butter, sugar and cream in a saucepan over a low heat. Bring to the boil and let bubble for 3-4 minutes, or until the sauce has thickened slightly. Not too long though or it will get hard when it cools and you'll have real toffee!
    • Preheat your grill (broiler) to high. Make holes all over the cooked pudding with a skewer. Pour some of the sauce over the pudding and place under the hot grill. Grill for 2-3 minutes, or until the sauce is bubbling. Keep an eye on it so it doesn't burn!
    • Serve immediately with remaining sauce. 


    Recipe adapted from here.

     I had some leftover sauce which I must say is delicious drizzled over freshly popped popcorn and paired with a nice Early Grey the next day.

    -Holly

    Wednesday, 24 December 2014

    Bring your hand to the Nanaimo Bar...

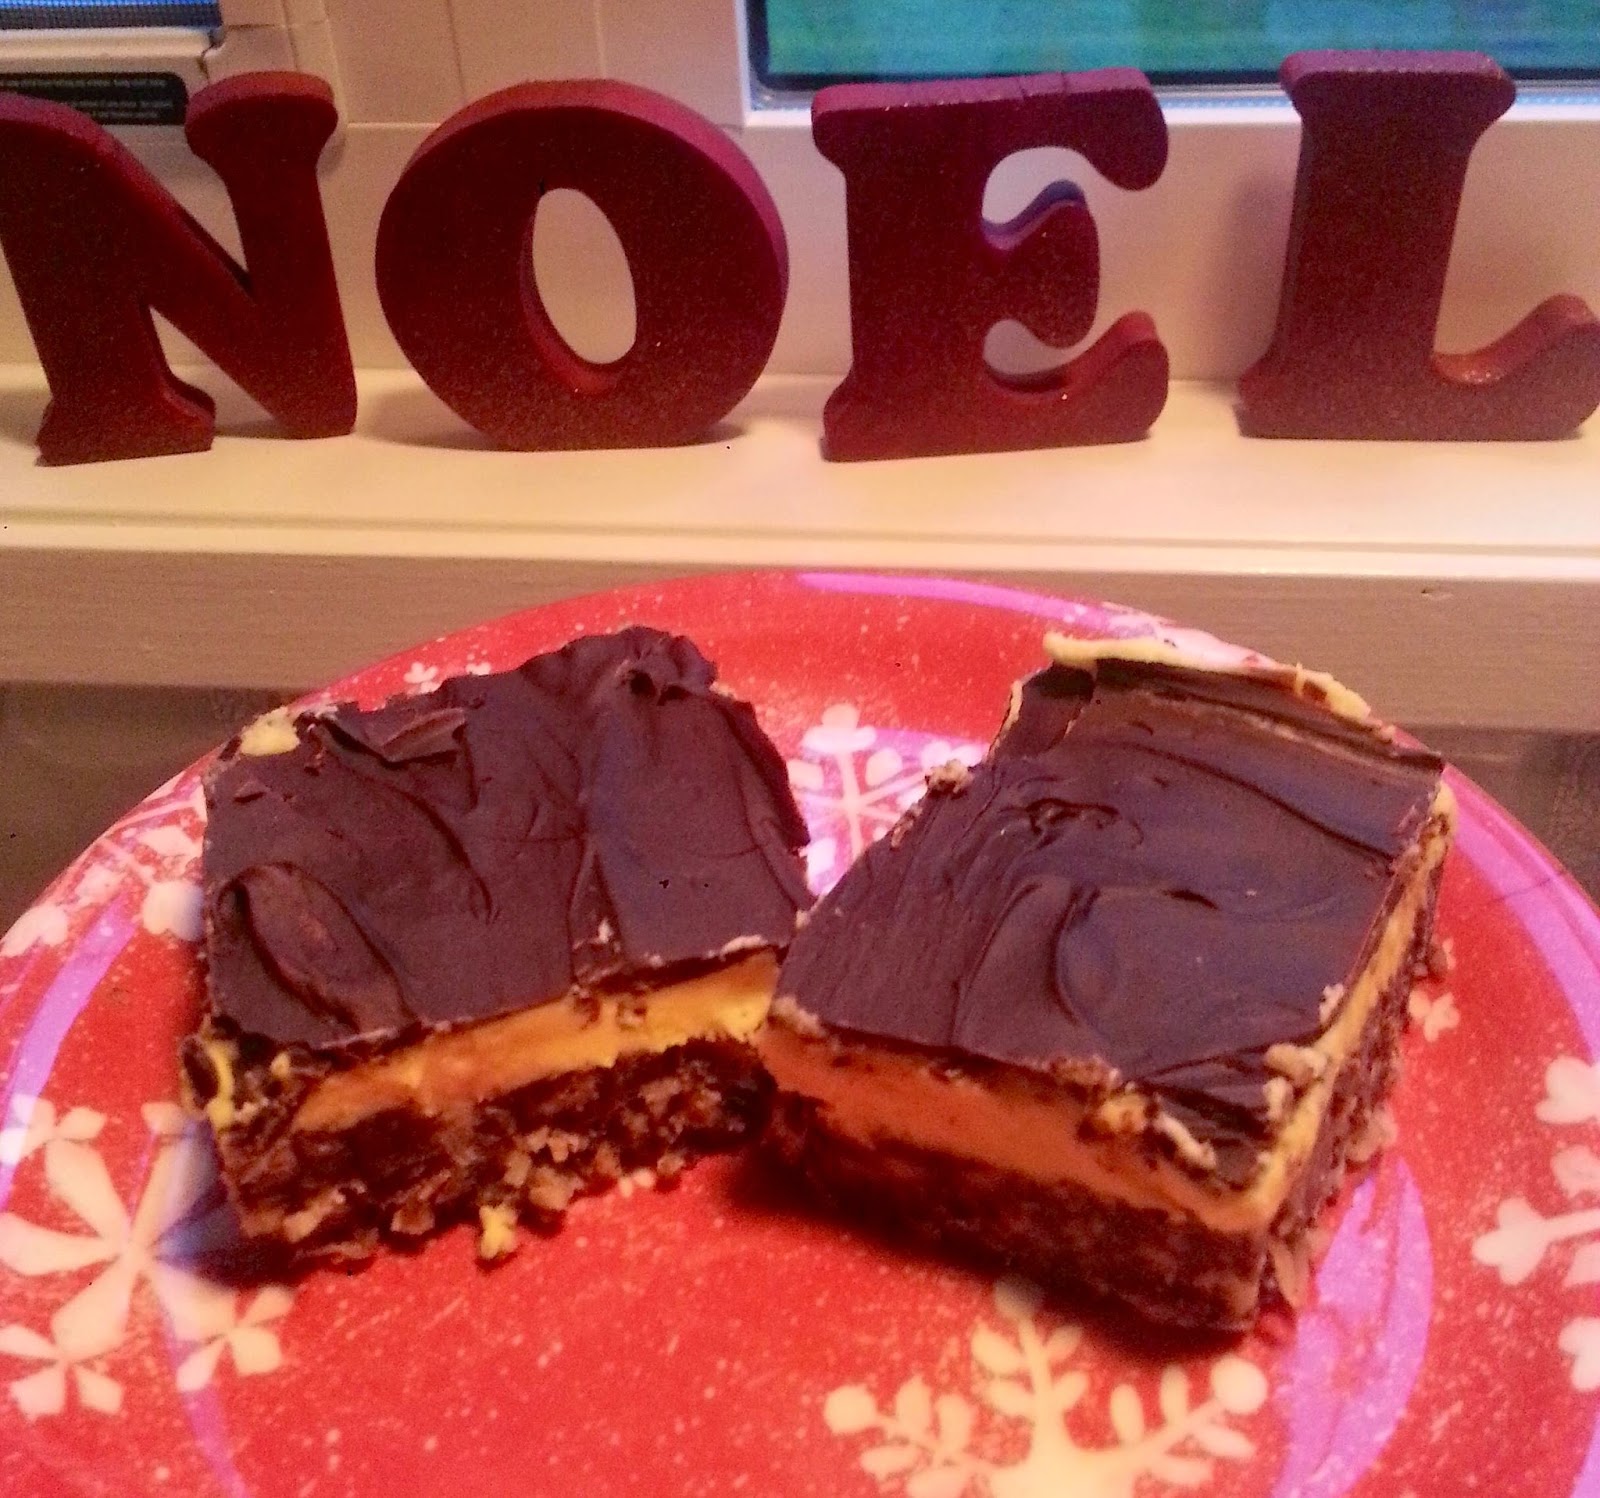
      I feel the way about my KitchenAid mixer that most people feel about their pets. Probably because I'm not allowed to have a pet and I form emotional attachments easily but nonetheless, I was incredibly excited to get back in a proper kitchen filled with my gadgets and ingredients I didn't have to pay for myself! It eased the pain of leaving London (even temporarily) enough that I did not embarrass myself in Heathrow. Much.


      My mum had already done a fair amount of baking before I arrived so I couldn't go as crazy as I would've liked, but the annual Christmas Nanaimo Bar had yet to be done and I jumped at the chance to prove my belief that everything tastes better when made with digestive biscuits instead of graham crackers. The recipe is simple and requires no actual baking, just time between layers to let them chill and set. Really the best part is crushing the digestive biscuits. You could put them in a food processor but I prefer the old Ziploc bag and meat mallet technique as it is both efficient and helps to relieve pent up aggression and stress. Also it's quiet and whilst I was doing all this my sister was still in bed and you know what they say about poking a sleeping bear and whatnot.

    Nanaimo Bars

    Base:
    1/2 c. butter
    1/4 c sugar
    1/3 c cocoa
    1 tsp vanilla
    1 egg, beaten
    1 1/2 c digestive biscuit crumbs
    1 c shredded coconut
    1/2 c finely chopped walnuts (I like mine roughly chopped, it's rustic)

    Grease the bottom and sides of a 9x9 pan. Cook butter, sugar, cocoa and vanilla over low heat, stirring until smooth. Add the beaten egg and heat just until thickened. Remove from the heat, stire in the crumbs, coconut and walnuts. Mix well. Press into the bottom of the pan, cover and chill for 30 minutes. 

    Filling:
    1/4 c butter
    3 tbsp custard powder
    3 tbsp milk
    1 tsp vanilla
    2 c icing sugar

    Cream butter, custard powder, milk and vanilla until blended. Add icing sugar. Beat until smooth, then whip until light and creamy adding more milk if needed. Spread evenly over first layer, cover and chill for 30 minutes.

    Top:
    4 oz semi sweet chocolate
    11/2 tsp butter

    Heat chocolate and butter on low heat, stirring until smooth. Spread evenly over filling. Let sit at room temperature until set. Score with a knife then refrigerate and cut into bars. 

    I forgot to score mine before I chilled it, so the chocolate cracked when I cut it, but what can you do?

    For those who are unfamiliar with Nanaimo Bar it's basically diabetes on a plate, but it's also the most delicious thing ever. To my Canadians; digestive biscuits can be found at Thrifty's and London Drugs I am told.


    Happy Holiday sugar comas!

    -Holly


    Monday, 3 November 2014

    Great British Baking: Ginger Cake

      So Bonfire Night is upon us. Being as I am not from the UK (though, am allowed to vote in local elections being part of the commonwealth as a nice gentleman who rang my doorbell informed me this evening) this is all new to me. I didn't realize that there are certain foods that are associated with the festivities of the evening. A ginger cake known as "Parkin" is one such food and when I stumbled upon a recipe for a Bonfire Night ginger cake, though not specifically Parkin, I decided to once again brave the third world baking conditions of my flat's kitchen and attempt to make some for the boyfriend. I had mentioned the other day that I like to bake things for people to thank them and he was upset that he had not yet received any baking, I jokingly responded that I had nothing to thank him for which apparently carried more weight than I had intended as the comment was brought up several times over the next few days. To be fair, I have plenty to thank him for as he's a lovely human being though he would never want anybody to know that.

      As baking in the ghetto does not come without complications I discovered quickly that this place doesn't have a micro plane, nor a cheese grater, or really any sort of grater which was going to prove a challenge for my "grated ginger" that was required. I resorted to a fine chop which took ages and left me with far bigger pieces than I would've liked but needs must. I also realised that I had bought whole cloves instead of ground cloves and was forced to "grind" some by hand. This whole baking expedition was quickly becoming rather labour intensive and this after a day of performance. Minor speed bumps aside the rest of the recipe seemed to go off without a hitch, there was a bit too much batter for the pan, so I ended up making a small leftover cake for myself, which is of course all gone by now.

    It's not much to look at. Also my photography needs work.

      The resulting cake was deliciously moist, and full of (chunky) ginger flavour. It's basically what one would imagine gingerbread would taste like as a cake and even though I've never been much of a fan of gingerbread, I actually quite enjoyed it. It will definitely go into the rotation for future bonfire nights. The response from the boyfriend when I bestowed this great gift upon him? "Well it's not my Gran's, but I'll let you know how it measures up." This is why I don't bake for him.

    The recipe: http://www.telegraph.co.uk/foodanddrink/cake-recipes/11201610/Ginger-cake-recipe.html

    Holly