Showing posts with label bars. Show all posts

Tuesday, 14 July 2015

Love is blonde, and lovers cannot see

I don't know what I just did, but it was delicious. I'm not entirely sure what I was expecting when I made this recipe but this wasn't it. I went into this with the intention of making Snickerdoodle Blondies. For those who don't know a Blondie is basically just a brownie without cocoa giving it more of a toffee flavour than chocolate.  Even though I wasn't baking for Count No-chocula he has made me more aware of recipes that contain chocolate so his presence lingers on long after the dust (flour? cocoa powder?) has settled. Also I just happened to have all the ingredients needed on hand so it's not like I'm thinking about him or anything..
   So these Snickerdoodle Blondies are a white, toffee-esque chewy square with cinnamon sugar sprinkled on the top. I had to cut the recipe into 2/3, because I'm a glutton for punishment and a mathematical challenge and also because that's approximately how much smaller our pan was than the one used in the original recipe. I used butter instead of the Crisco used in the original recipe (because Crisco makes me uncomfortable unless it's in pastry and even then I have to not think about it) and they ended up a little on the greasy side, but seriously as long as there was a serviette close by who cares, they tasted amazing. The bake time/temperature was also a bit off on my oven and so I ended up with gooey centres and crispy tops and sides which is the greatest thing ever and I'm not complaining.
 
Snickerdoodle Blondies

1 c butter, softened
1 1/2 c sugar
1/2 dark brown sugar, packed
2 eggs
1/2 tbsp vanilla
2 c flour
2 tsp baking powder
1 tsp cinnamon
less than 1/2 tsp salt

Topping:
2 tbsp sugar
2 tsp cinnamon

Preheat your oven to 180º C (350º F, gas mark4) and line a 9x13 pan with parchment paper (purely for ease of cleanup, you can lightly grease the pan and just whack it right in if you don't mind doing the dishes)

Cream butter, both sugars, eggs and vanilla until smooth. Add in flour, baking powder, cinnamon and salt and mix until well combined. Pour it into your prepared pan and spread evenly using a rubber spatula or your good ol' hands. Sprinkle with the cinnamon sugar mixture and bake for 30 minutes or until golden brown and the centre has set.

Clean up the flour that has managed to cover 2/3 of your kitchen.

That last one might just be for me.

Happy Baking!

-Holly


Sunday, 22 February 2015

Date Walnut Granola Bars

 I'm a little behind with my blogging these days. Working 10 hour days leaves little time for writing and even less for baking, but fear not, I've managed to squeeze in a little time in the kitchen over the past few weeks! Being constantly on the go has left me in need of quick snacks that travel easily and not being a fan of things like prepackaged bars I had been hoping to make some healthy granola bars myself. I'd been on the hunt for awhile looking for one that called for ingredients I already had (we're on a budget here!) that wasn't just some sad combination of peanut butter and oats mushed together and refrigerated. In swoops Mama Bear with a recipe from her Looneyspoons Collection cookbook!
 

This recipe calls for oats, whole wheat flour, honey, pumpkin and just a smidge of butter among other things. I adapted the recommended fruits and nuts to suit my tastes and came up with two variations: Date-Walnut, and Dark Chocolate Cherry Almond. Personally, I have to say I prefer the Date-Walnut as the dark chocolate seems to overwhelm the subtle cinnamon flavour, but both are delicious and have received the Non Healthy Eater Seal of Deliciousness from my coworkers.


DATE WALNUT GRANOLA BARS
(For chocolate cherry simply sub 1/2 cup each of mini chocolate chips, chopped almonds and dried cherries for dates and walnuts)

Dry ingredients: date-walnut in the front.
½ cups quick-cooking oats (not instant)
1 cup unsweetened shredded coconut
¾ cup chopped walnuts
¾ cup chopped dates
 cup + 2 tbsp whole wheat flour
1 tsp cinnamon
½ tsp salt
¾ cup canned pure pumpkin (not pumpkin pie filling!!)
½ cup liquid honey
¼ cup butter, melted
1 tsp vanilla 

Preheat your oven to 350°F (180ºC). Line a 9 x 13-inch baking pan with parchment paper, letting the paper overhang on two opposite sides. 


Right out of the oven!
Combine the first 9 ingredients in a large bowl and mix well. In a medium bowl, whisk together pumpkin, honey, butter and vanilla and pour over dry ingredients. Using a wooden spoon mix thoroughly until dry ingredients are coated with pumpkin mixture. Make sure there aren’t any dry oats in the bottom of the bowl! 

Pour the wet granola mixture into the prepared pan and spread it evenly to the edges. Using your hand, press down firmly on the granola so that it’s tightly packed in the pan.
Bake on the middle rack of your oven for about 25 minutes, until top turns a light golden brown and feels dry to touch. Remove and cool completely on a wire rack. Lift cooled slab of granola from pan by holding on to parchment paper and transfer to a cutting board. Using a large, sharp knife, cut the granola into 16 bars, about 1½ x 4 inches each.
Original recipe can be found here. 


Happy Snacking! 
-Holly            
                                                                             

Wednesday, 24 December 2014

Bring your hand to the Nanaimo Bar...

  I feel the way about my KitchenAid mixer that most people feel about their pets. Probably because I'm not allowed to have a pet and I form emotional attachments easily but nonetheless, I was incredibly excited to get back in a proper kitchen filled with my gadgets and ingredients I didn't have to pay for myself! It eased the pain of leaving London (even temporarily) enough that I did not embarrass myself in Heathrow. Much.


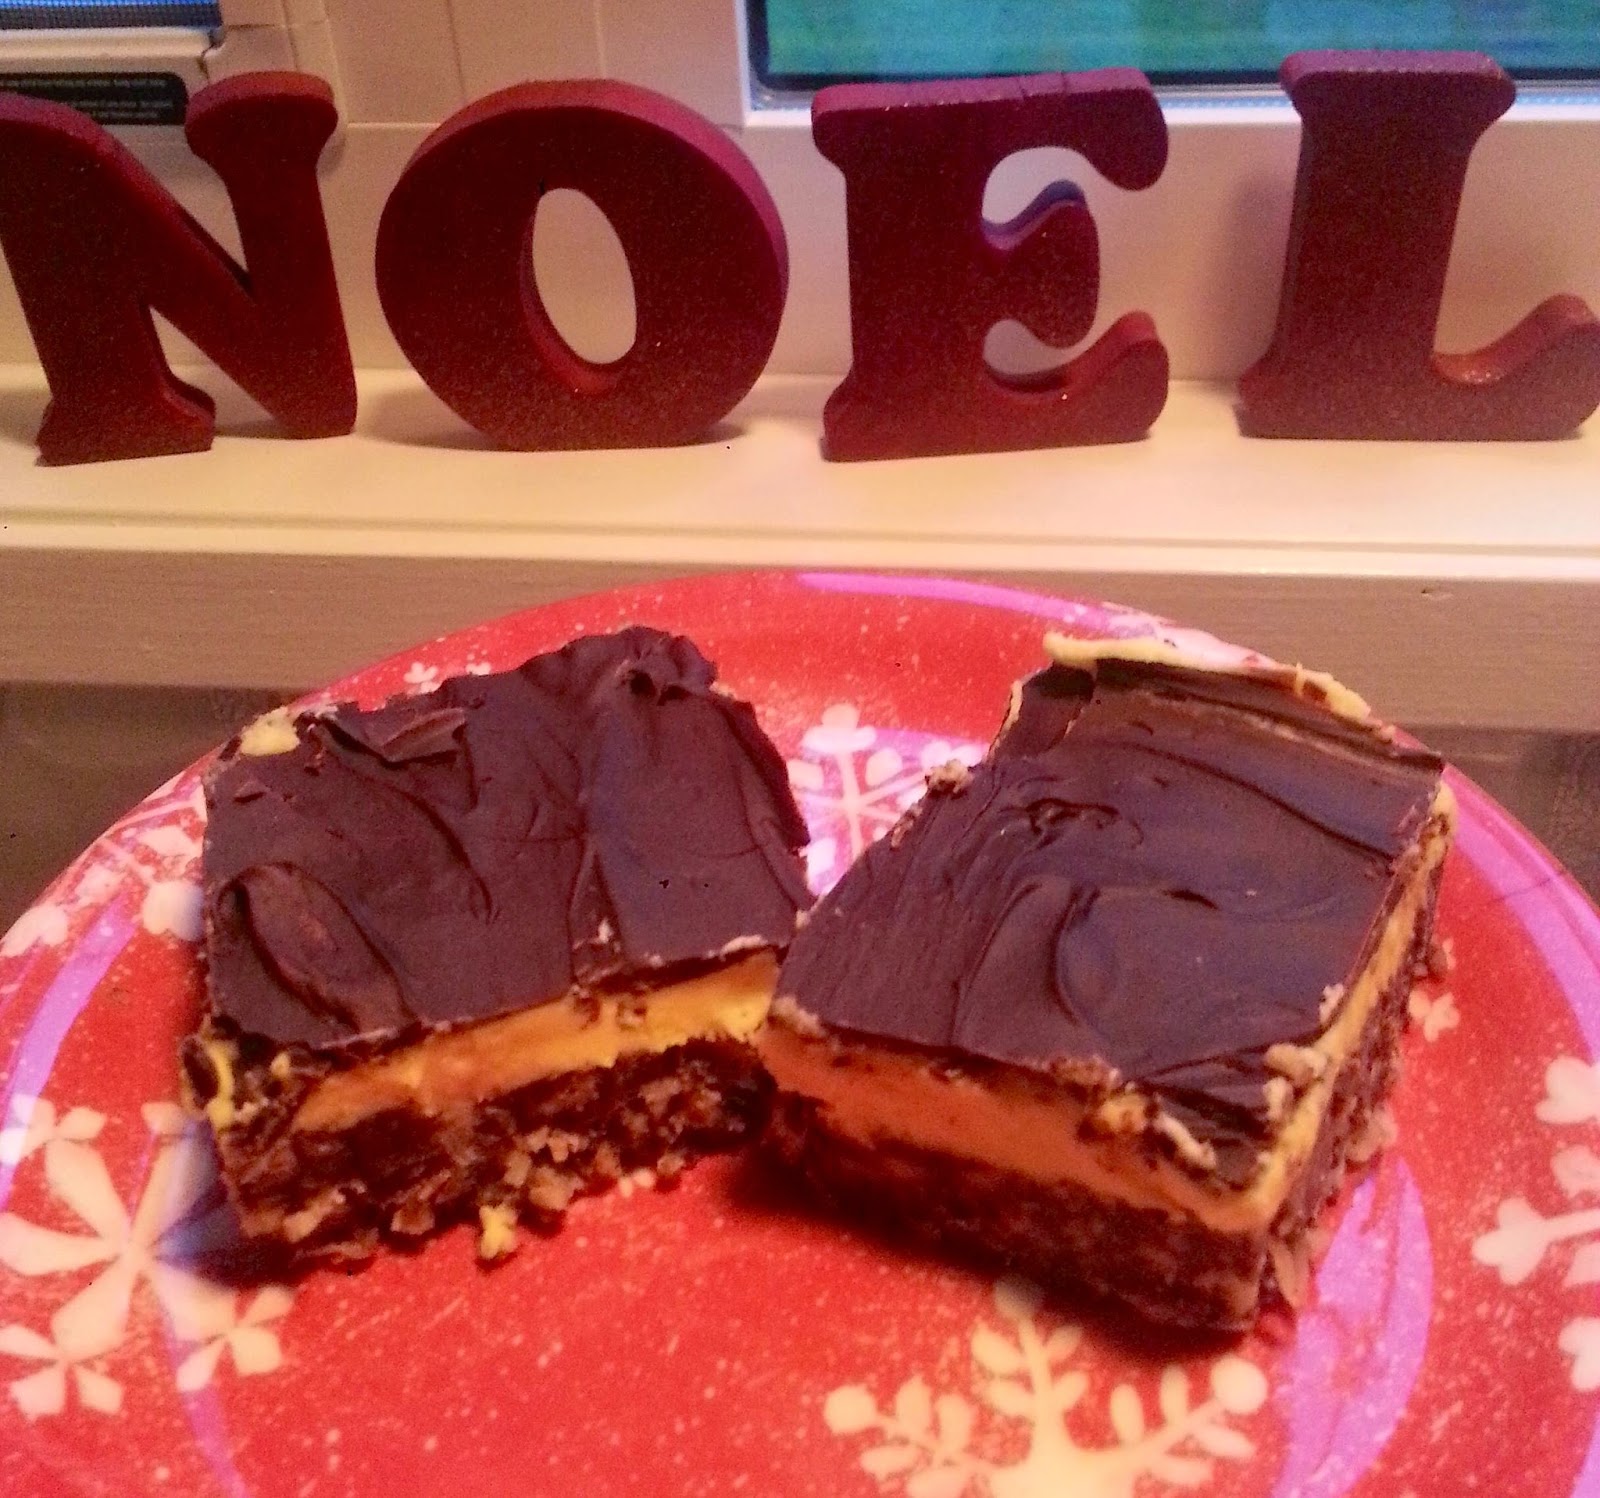
  My mum had already done a fair amount of baking before I arrived so I couldn't go as crazy as I would've liked, but the annual Christmas Nanaimo Bar had yet to be done and I jumped at the chance to prove my belief that everything tastes better when made with digestive biscuits instead of graham crackers. The recipe is simple and requires no actual baking, just time between layers to let them chill and set. Really the best part is crushing the digestive biscuits. You could put them in a food processor but I prefer the old Ziploc bag and meat mallet technique as it is both efficient and helps to relieve pent up aggression and stress. Also it's quiet and whilst I was doing all this my sister was still in bed and you know what they say about poking a sleeping bear and whatnot.

Nanaimo Bars

Base:
1/2 c. butter
1/4 c sugar
1/3 c cocoa
1 tsp vanilla
1 egg, beaten
1 1/2 c digestive biscuit crumbs
1 c shredded coconut
1/2 c finely chopped walnuts (I like mine roughly chopped, it's rustic)

Grease the bottom and sides of a 9x9 pan. Cook butter, sugar, cocoa and vanilla over low heat, stirring until smooth. Add the beaten egg and heat just until thickened. Remove from the heat, stire in the crumbs, coconut and walnuts. Mix well. Press into the bottom of the pan, cover and chill for 30 minutes. 

Filling:
1/4 c butter
3 tbsp custard powder
3 tbsp milk
1 tsp vanilla
2 c icing sugar

Cream butter, custard powder, milk and vanilla until blended. Add icing sugar. Beat until smooth, then whip until light and creamy adding more milk if needed. Spread evenly over first layer, cover and chill for 30 minutes.

Top:
4 oz semi sweet chocolate
11/2 tsp butter

Heat chocolate and butter on low heat, stirring until smooth. Spread evenly over filling. Let sit at room temperature until set. Score with a knife then refrigerate and cut into bars. 

I forgot to score mine before I chilled it, so the chocolate cracked when I cut it, but what can you do?

For those who are unfamiliar with Nanaimo Bar it's basically diabetes on a plate, but it's also the most delicious thing ever. To my Canadians; digestive biscuits can be found at Thrifty's and London Drugs I am told.


Happy Holiday sugar comas!

-Holly